
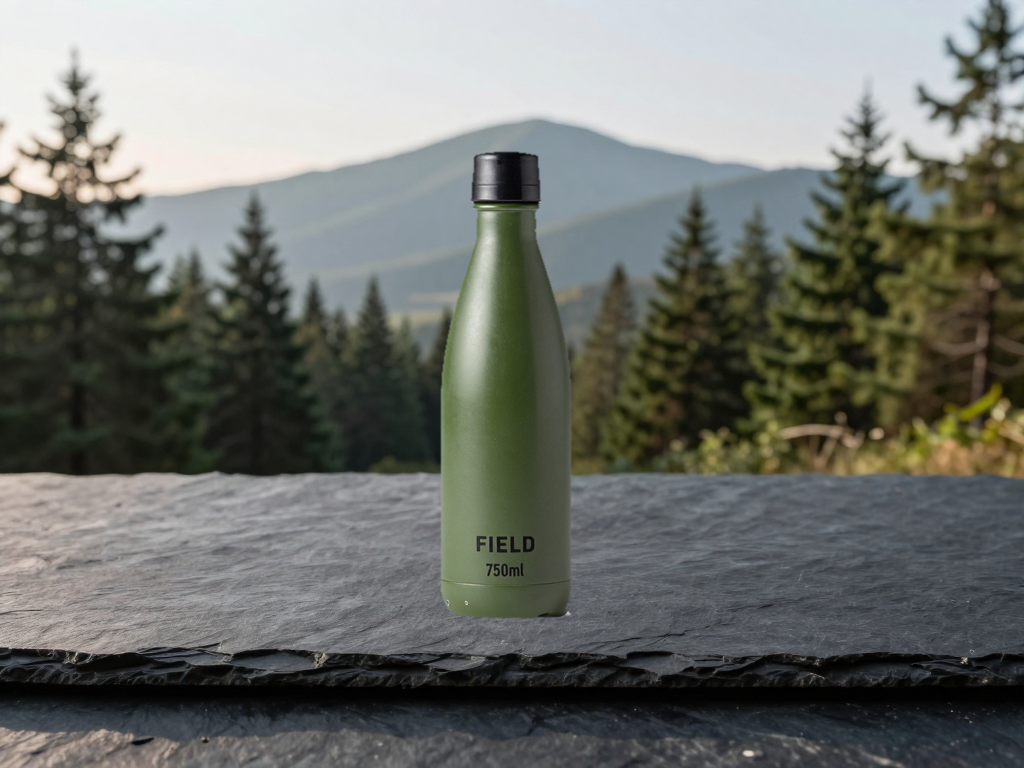
- 01 / processPrepare
Keep an authorised product image on its own layer.
- 02 / processGenerate
Create an empty surface and setting with suitable light.
- 03 / processCompose
Place the product and separate contact shadow above it.
- 04 / processExport
Compare details, save a layered master and reopen the final image.
Choose a route
| Route | Cost basis | What you need | What changes |
|---|---|---|---|
| Local ComfyUI + Z-Image-TurboFree local | No provider generation-credit fee for this local core-model route. Own hardware, electricity, storage and setup. | Compatible ComfyUI/runtime, matching diffusion model, encoder and VAE, plus an authorised product cutout for separate compositing. | Save prompts and recipe locally. The displayed run uses existing quantised components, distinct from the standard BF16 tutorial files. |
| Comfy Cloud + separate-layer image editorFree allowance or paid hosted | Account allowance or paid plan/runtime credits. Check current template availability, quotation and terms before running. | Browser, account and supported Z-Image workflow. Download the empty background and composite your product separately. | Hosted GPU capacity avoids local generation hardware setup. This cloud workflow was not executed here. |
| Photopea for separate-layer compositingFree browser editor | Free browser editor route; generation is performed separately. | Background PNG, authorised transparent product layer and browser. Save a layered master and final export. | Control placement, masks and shadows by hand. The described Photopea sequence is documentation-based; displayed composites use deterministic editing. |
Provider links are ordinary links. Free local software still needs hardware, storage and setup time; inspect current provider terms before paying.
Give your product a new setting without redrawing it
A camping bottle on a quiet forest backdrop tells a different story from the same bottle on a clean studio surface. You can make both settings with AI while keeping the product on a separate image layer.
That separation is the useful part of this workflow. Generate an empty background, then place your authorised photograph or transparent product cutout over it. The AI never needs to rewrite your label, invent a different lid or guess the packaging text.
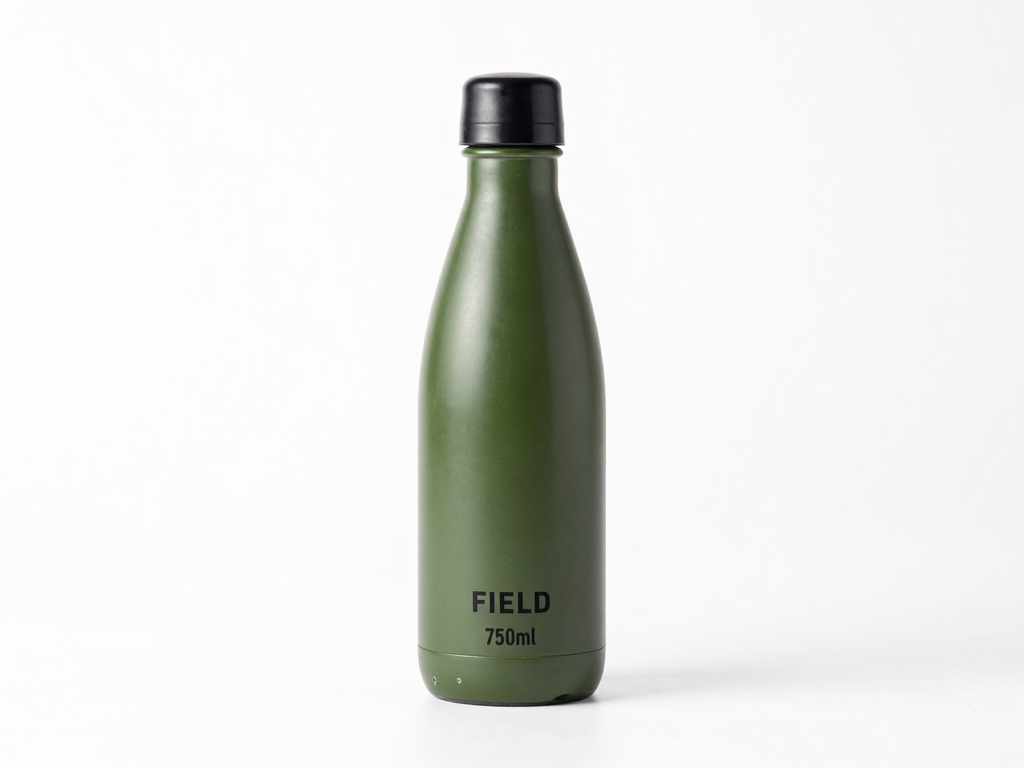
Our demonstration uses a fictional olive camping bottle generated locally, with FIELD and 750 ml on its front. We made the two backgrounds separately, then cropped, resized and composited the same bottle onto both in ComfyUI. The first cutout had a visibly jagged, pale edge; we kept it beside a trimmed and feathered version so you can see the difference. This is an AI-generated practice item, rather than a photograph of a physical product; use your own authorised photograph for an actual listing.
Choose the route that suits your computer
ComfyUI is a good fit if you already have suitable local hardware. You can keep the generation, prompts and files on your computer, choose a model and save the recipe. The local core-model route has no provider generation-credit fee; hardware, electricity, storage and setup still cost you something.
Comfy Cloud is the easier alternative if your PC is not ready for image generation. Its official Z-Image tutorial provides a cloud workflow route. You use hosted GPU capacity, download the background and do the separate compositing in an image editor. That avoids a local GPU purchase and model installation for this task.
For compositing, Photopea gives you layers in your browser, while an installed image editor can handle local files. The layer instructions below are a documentation-based Photopea route; our displayed composites are made separately from the AI generation.
Before you start
Collect three inputs:
- A permitted product photograph or cutout. Use your own image, an authorised supplier image or our clearly labelled fictional practice bottle. A front-facing product is a good first subject.
- A scene brief. Choose the surface, setting, camera height and direction of light. A background that matches your photograph is easier to use than one requiring you to distort the product.
- A target shape. Our examples are landscape, 1,024 × 768. Pick a size suitable for your intended placement; check a marketplace's current image rules before uploading.
Keep the untouched original. A layered master and a separately exported final image will let you revise the scene later without losing the product.
Transparent glass, polished metal and glossy packaging are harder first subjects because they reflect their surroundings. Use a simple opaque item while learning the process.
1. Prepare a clean product layer
If you already have a transparent PNG, open it and inspect the edges against both a dark and light background. Check the cap, handle, logo and any fine features.
If you are starting from a photograph, open a copy in Photopea or your preferred editor. Make a selection around the product and use a layer mask to hide the background. In Photopea, Layer → Raster Mask → Add creates the mask; select its thumbnail before editing it. White reveals the layer and black hides it. The official mask guide explains how to adjust the selection without permanently deleting image data.
Zoom in and tidy the boundary before exporting a transparent PNG. Keep the original photograph and layered file as well. Avoid trimming away part of the product just to make the cutout look cleaner.
Our practice render starts on white. The ComfyUI editing stage makes a transparent cutout from it; you can also download that cutout directly to practise placement in your own editor.
2. Generate a background with space for the product
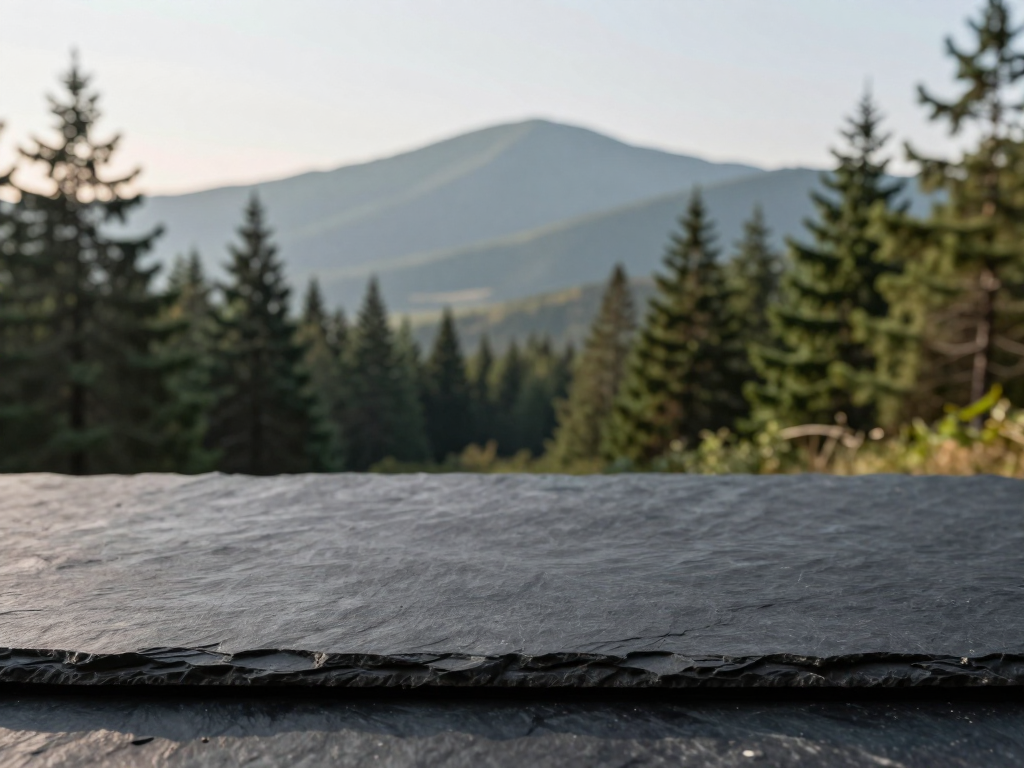
Describe the setting without asking the AI to create your item. Here is the original prompt used for our outdoor background:
Photorealistic empty product photography background. A wide flat dark slate stone surface in the foreground, enough clear space at centre for one bottle to be added later. Quiet pine forest and distant mountains softly blurred in the background. Warm morning sunlight comes from the upper left. Camera at tabletop height, straight horizon. Natural earthy green and charcoal colours. No people, no products, no bottle, no letters, no logos, no watermark. Professional outdoor catalogue setting.
Notice the empty centre, tabletop camera height and upper-left light. They give you a place to put the bottle and a direction for a contact shadow. A good-looking background alone is not enough: it needs a usable surface and a plausible perspective for your input.
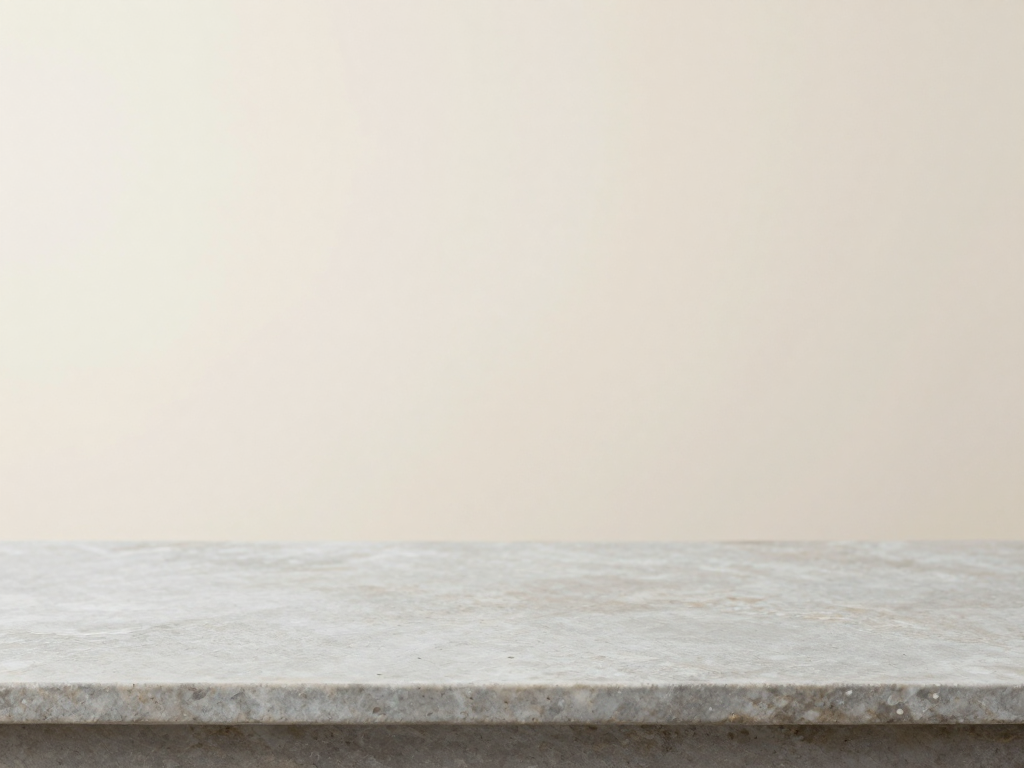
Our studio variation changes the setting while keeping the intended light direction:
Photorealistic empty product photography background. A flat light grey stone tabletop in the foreground and a softly lit cream plaster wall behind it. Clear empty centre, no objects. Daylight comes from the upper left. Camera at tabletop height, straight-on composition, subtle realistic surface texture. Minimal professional catalogue setting. No people, no products, no bottle, no letters, no logos, no watermark.
If the model adds a bottle or an unwanted object, reject that result rather than concealing it behind your product. Simplify the scene or change the seed. Negative words in a prompt are instructions to try, not a guarantee.
3. Set up the local ComfyUI recipe
Use the official Z-Image-Turbo template guide as the starting point. It documents the diffusion model, text encoder and VAE as three separate components. Its standard files are z_image_turbo_bf16.safetensors, qwen_3_4b.safetensors and ae.safetensors.
Our run used existing quantised components instead. They are different files from the standard BF16 tutorial; do not treat the filenames as interchangeable or assume a quantised copy has the same provenance.
| Component | Our selected file | Model folder |
|---|---|---|
| Diffusion model | z_image_turbo_int8_convrot.safetensors |
models/diffusion_models/ |
| Text encoder | qwen_3_4b_fp8_mixed.safetensors |
models/text_encoders/ |
| VAE | ae.safetensors |
models/vae/ |
Select the matching component in each loader. Do not put the diffusion model in the checkpoint loader. If your files are missing, read Why is my ComfyUI model missing from the dropdown? before changing the graph.
These are the core connections in our executed graph:
UNETLoader → ModelSamplingAuraFlow → KSampler model
CLIPLoader (type: lumina2) → CLIPTextEncode → KSampler positive
CLIPTextEncode → ConditioningZeroOut → KSampler negative
EmptySD3LatentImage → KSampler latent_image
KSampler → VAEDecode samples
VAELoader → VAEDecode vae
VAEDecode → SaveImage
Set the ModelSamplingAuraFlow shift to 3 and sampling mode to flow. Use the original prompt in CLIPTextEncode. The negative input comes from ConditioningZeroOut; it is not a second negative-prompt text box in this recipe.
4. Run one image and save the recipe
Our two runs used these settings:
| Setting | Outdoor | Studio |
|---|---|---|
| Width × height | 1,024 × 768 | 1,024 × 768 |
| Batch size | 1 | 1 |
| Seed | 26101201 | 26101202 |
| Steps | 8 | 8 |
| CFG | 1 | 1 |
| Sampler | res_multistep |
res_multistep |
| Scheduler | simple |
simple |
| Denoise | 1 | 1 |
| Sampling shift | 3 | 3 |
Choose one prompt, apply the matching seed and run the workflow once. Inspect the saved background at full size before compositing: look for a level placement surface, suitable space, unwanted text and unexpected objects. Save the original PNG, prompt, settings and workflow separately.
Our local environment was ComfyUI 0.37.0, frontend 1.52.7, Python 3.12.13 and PyTorch 2.14.0+cu130, on an NVIDIA GeForce RTX 5060 Ti. The two submissions reached observed completion after approximately 12.05 seconds and 6.03 seconds respectively. Those timings include submission and observation; they are examples from this machine, not GPU-only measurements or a prediction for yours.
Our three stored components match the full published SHA256 identifiers in the Comfy-Org Z-Image Turbo repository, which declares Apache-2.0 and links to the original model. The starter records retain those identities and source information. Inspect and retain the relevant terms when obtaining models; the download contains recipes and results, not model weights.
5. Composite it in ComfyUI without another generation
Our second graph is an editing graph: it loads saved images and uses core crop, scale, mask and composite nodes. There is no diffusion sampler or model call in this stage.
The bottle render uses seed 26101204 with the same model components, dimensions and sampler settings as the backgrounds. Its exact creation prompt and record are included separately, so you can distinguish that generated practice input from the empty-scene runs.
Crop the product render to 280 × 680, starting at x 380, y 50, then resize that crop to 210 × 510 with lanczos. This is the product layer used in both examples. Resizing has already changed its pixels, so the subsequent check compares against this resized cutout, not the larger original render.
Our first-pass masking chain is ImageToMask (red) → ThresholdMask (0.82) → InvertMask → GrowMask (expand 8) → GrowMask (expand -11). Both GrowMask nodes use tapered_corners: true. The threshold alone cut holes into highlights; the grow-then-shrink operation fills gaps and trims the boundary for this example. It still left a rough, pale edge around parts of the bottle.
For the rough transparent PNG, feed that first-pass mask through another InvertMask into JoinImageWithAlpha, with the resized product as its image input. For the rough composite, use the first-pass GrowMask output directly as the ImageCompositeMasked mask. Use each background as destination, the same resized product as source, place it at x 407, y 130, and leave resize_source false. Save each result through its own SaveImage node.
6. Trim and feather the edge, then compare
We refined the same saved images without another AI generation. After the first-pass mask, add this chain:
First-pass GrowMask output
→ GrowMask: expand -2, tapered_corners true
→ MaskToImage
→ ImageBlur: blur_radius 1, sigma 0.8
→ ImageToMask: channel red
→ ImageCompositeMasked mask
The extra inward trim reduces the bright rim, and the blur introduces a small soft transition at the boundary. Connect this refined mask to both composites, keeping the crop, resize, source image, placement and backgrounds unchanged. For a refined transparent cutout, invert the refined mask before JoinImageWithAlpha; that node uses the inverted alpha convention in this graph. Save it separately as product-cutout-refined.png.
Save the two new composites as outdoor-composite-refined.png and studio-composite-refined.png. Keep the rough files too: a comparison makes it easier to judge whether the trim has helped or simply removed part of the product.
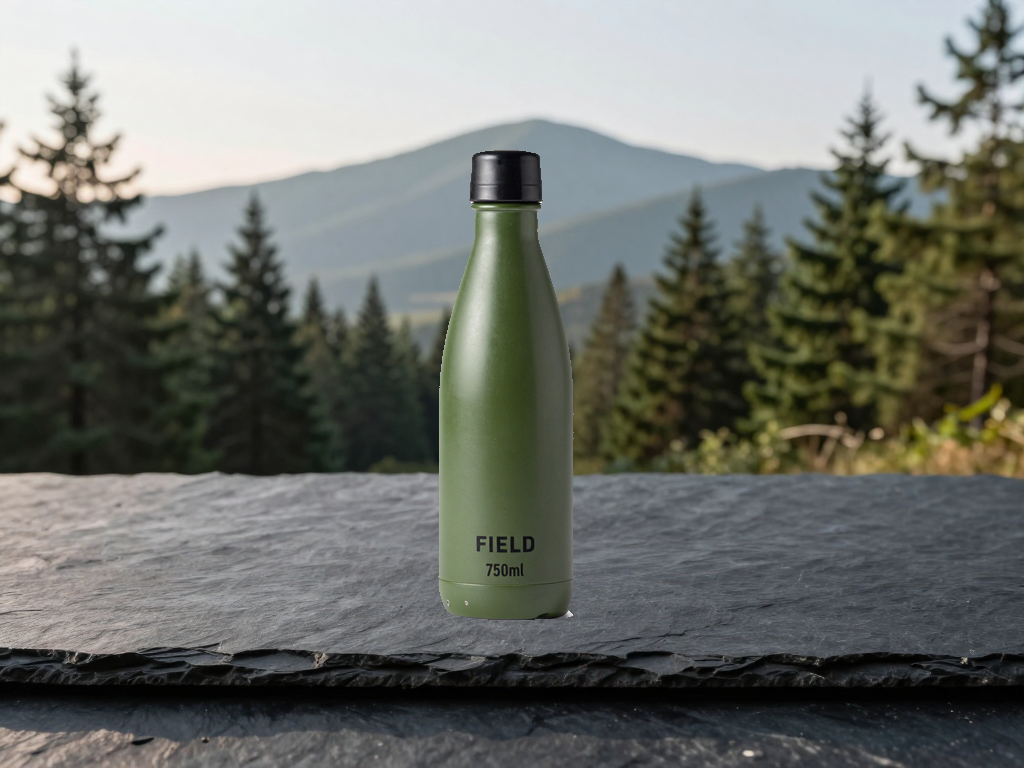
The original and refined editing API graphs are supplied separately in the reader pack. They use core image-processing nodes, with no sampler or paid provider call. These mask values suit our controlled white-background example; a different photograph needs its own outline and highlight checks. A narrower edge is not automatically a better cutout.
Use Photopea when you prefer editing by hand
For the browser-editor route:
- Open the saved background in Photopea with File → Open.
- Drag your transparent product PNG into the open document's main canvas. Photopea documents this as inserting the file as a new Smart Object layer; dropping it on the tab bar opens a separate document instead.
- Check the product layer is above the background in the Layers panel. Rename it Product original and rename the background AI background.
- Use Edit → Free Transform if positioning or resizing is needed. Keep width and height proportional. Do not stretch the product to fit the scene; choose a better background if the angles disagree.
- Position the base on the visible surface, with a little space around the edges for your intended crop.
- Keep the original layer untouched. Resizing and rotation can resample pixels, so retain the source PNG even when the edited composition looks correct.
The Photopea opening/saving guide and Free Transform guide document those controls. We used deterministic compositing for our example; this Photopea sequence is an alternative you can follow and edit by hand.
Optional: add a contact shadow on its own layer
Our displayed composites have no added contact or cast shadow. You can refine the setting further in your editor: make a small shadow layer between the product and background, rather than drawing onto the product.
Start with a soft, low-opacity dark ellipse just under the base. Keep its darkest area close to the contact point and let it fade away from the upper-left light. Adjust the layer until the product looks seated on the surface. The shadow is an artistic addition, not a recovered physical measurement.
If the product itself was lit strongly from the opposite direction, changing the shadow will not solve the mismatch. Choose another background or photograph the product with light that suits the scene. Avoid generatively relighting a label if preserving its appearance is the priority.
7. Check the product, then export
Compare the final image against your untouched source at a comfortable zoom. Check the exact words, logo, cap, handle, seams, colour and proportions. Also inspect the outline for bright halos or missing parts.
The rough composites retain 52,362 opaque cutout pixels exactly. After trimming and feathering, the refined PNGs retain 48,917 fully opaque pixels with zero RGB difference in each setting. The smaller count reflects the changed mask: soft boundary pixels blend with the background and are outside that exact-match check. The measurement compares with the resized cutout, not a photographed physical item or the larger original render.
For your own strict preservation check, keep the final cutout at its native size and orientation with no colour adjustment or effects. Transparent edges blend with the new background. Scaling, colour conversion and JPEG compression change that stricter claim, even if the product still looks right.
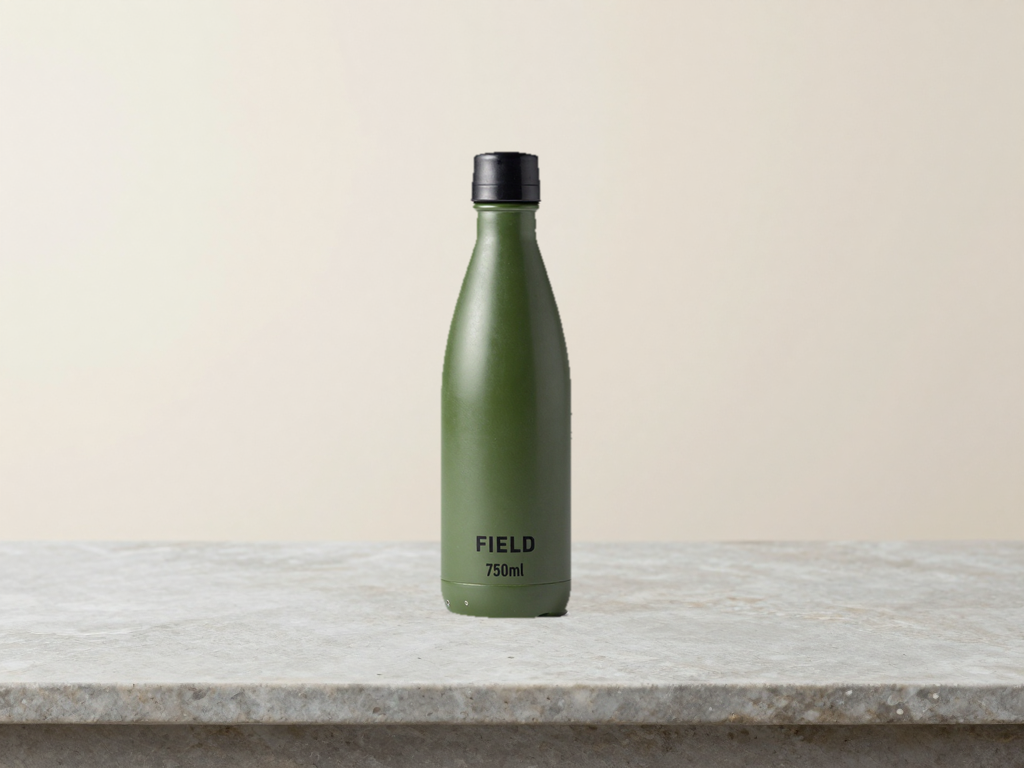
In Photopea, save File → Save as PSD for the layered master. Then use File → Export As → PNG for a lossless distribution copy, or JPG if the destination requires it. Reopen the exported file, check dimensions and look at the label again. Keep the source, master and export in the same project folder.
For a real sales listing, ensure the item shown matches what the customer will receive. Do not make a fictional accessory, size or material look like part of the actual product. Check the destination's current background and image rules.
The paid hosted alternative
Comfy Cloud is attractive when you want the workflow without maintaining the local generation computer. Start from the official Z-Image tutorial's Run on Comfy Cloud route, confirm that the required template and components are available, and check the active quotation before running.
Hosted generation uses the service's account allowances and runtime credits. Download the empty background and follow the same separate-layer compositing steps. You do not need to upload the product just to generate its setting.
We did not execute that cloud route here. Its value is hosted capacity and easier machine setup; it does not remove the need to check perspective, product accuracy and exports.
Troubleshooting
| Problem | What to change |
|---|---|
| The loader cannot find a model | Check the component folder and exact filename; refresh or restart ComfyUI as appropriate. Do not substitute an unrelated checkpoint. |
| The graph has missing nodes | Check the ComfyUI/template versions and startup errors. Our recipe uses core nodes with custom nodes disabled. |
| The generated scene contains a bottle | Reject it; simplify the empty-scene prompt or change the seed. Keep your product out of the generation input. |
| The product looks stretched | Reset the transform and keep proportions locked. Match the background to the input angle. |
| A pale outline appears around the cutout | Inspect the mask against dark and light surfaces. Tidy edges without removing part of the item. |
| The cutout edge is jagged | Compare the hard-mask version with a small inward trim and feather. Our refinement uses GrowMask -2 then ImageBlur radius 1, sigma 0.8; inspect the cap and base afterwards. |
| A mask cuts holes in highlights | Our initial red-channel threshold of 0.82 removed bright parts of the bottle. Review the mask, not just the outline, and use a threshold/closing operation that fits the input. |
| The bottle looks as if it is floating | Put the base on a suitable surface and adjust a separate contact-shadow layer. |
| The label changed | Compare with the untouched source. Check whether the product passed through a generative edit or whether you exported a different layer. |
| Generation runs out of memory | Lower the image size or use a suitable hosted route; changing models changes the recipe and needs a fresh check. |
| The source stayed intact but the final colour changed | Check editor colour handling, adjustments and export format. Retain a lossless comparison before judging preservation. |
Take the useful files with you
The starter files include both original background prompts, local generation recipes, original and refined editing API graphs, a composition plan and filled execution/settings records. The article separates the fictional product input, generated backgrounds, rough composites and refined composites so you can inspect what each stage changes.
Begin with one scene and one product. Once it works, change the background brief to create a second setting while retaining the same authorised product layer. That is a repeatable creative task you can use for campaign images, editorial mockups or product mood boards without asking an image model to recreate every detail of the item.
Make an empty outdoor setting
Original prompt used for our local background generation. The bottle is added separately; it is not an AI-generated replacement for the product input.
Photorealistic empty product photography background. A wide flat dark slate stone surface in the foreground, enough clear space at centre for one bottle to be added later. Quiet pine forest and distant mountains softly blurred in the background. Warm morning sunlight comes from the upper left. Camera at tabletop height, straight horizon. Natural earthy green and charcoal colours. No people, no products, no bottle, no letters, no logos, no watermark. Professional outdoor catalogue setting.Take the steps with you
Reader starter files
Original prompts, native background-generation recipes, separately labelled rough and refined non-generative editing API graphs, composition plan and filled settings/execution records. No model weights or photographed physical product are included.
Download the starter packSources and testing status
Primary references checked 2026-10-12. Created locally on 12 October 2026: two empty Z-Image backgrounds and one fictional AI-generated FIELD bottle, then non-generative ComfyUI crop/resize/mask compositing. We compare the rough hard mask with an inward-trimmed, lightly feathered version. Both need further lighting/shadow work for a finished advert.