
- 01 / processDescribe
Choose a fresh subject, setting, light and illustration style.
- 02 / processSet up
Select the three matching components and exact local graph settings.
- 03 / processCreate
Run one image and inspect the subject, details and any generated lettering.
- 04 / processKeep
Save the original PNG and a separate workflow JSON, then prepare your display copy.
Choose a route
| Route | Cost basis | What you need | What changes |
|---|---|---|---|
| Local ComfyUI + Z-Image TurboFree local | No provider credit charge for this local graph. You supply the hardware, storage, electricity and setup time. | A compatible PC, ComfyUI with the core nodes and three matching components. Our tested PC has an RTX 5060 Ti with 16 GB VRAM. | Control the prompt, seed, graph and saved files. You maintain the installation and choose compatible models. |
| Higgsfield in your browser — affiliate linkFree allowance or paid hosted | Generation access and credit quotations depend on the current tool and your account. Check before running or subscribing. | A browser, internet connection, account and suitable inputs; no local AI GPU or model installation for hosted generation. | An easier starting point on a basic PC, with image and connected video tools. Our separate guide demonstrates a character and animation, rather than this fox recipe. |
Higgsfield links labelled affiliate are sponsored links. Other references are ordinary links. Free local software still needs hardware, storage and setup time; inspect current provider terms before paying.
Make an illustration from your own idea
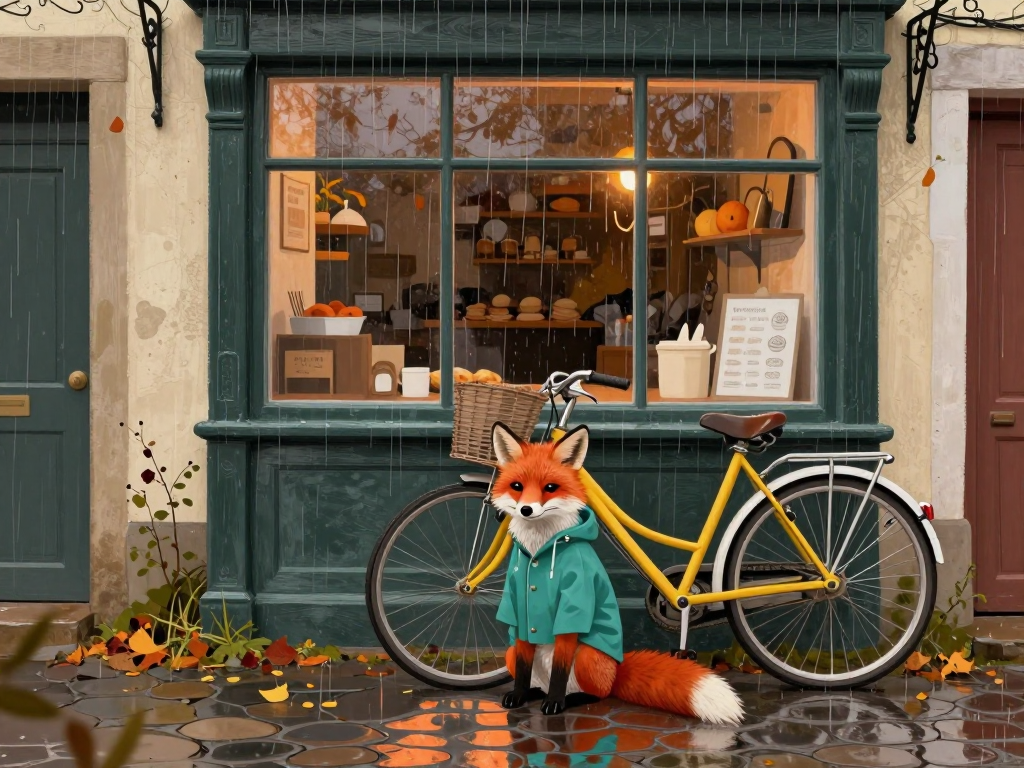
A fox in a teal raincoat, an old yellow bicycle and a rainy bakery window: this started as a short description, then became the image above. You can use the same workflow for an animal character, a landscape, an imaginary shop or a completely different scene.
This guide uses Z-Image Turbo in local ComfyUI. You write the scene, choose the canvas and run the graph on your own computer. The supplied prompt and workflow give you a reproducible starting point; changing the subject is the fun part.
Our image is an original local result, created on 12 October 2026. Open the full-resolution PNG to inspect it. The bakery signs contain imperfect lettering despite our request for none. Keep generated signage out of real branding, and add any necessary words yourself after export.
What you need
- A working local ComfyUI installation with Z-Image Turbo support. Our run used ComfyUI 0.37.0 and frontend 1.52.7.
- A compatible GPU and enough memory to load the three components below. We used an NVIDIA GeForce RTX 5060 Ti with 16 GB VRAM. That is our tested machine, rather than a minimum specification for every setup.
- The exact diffusion model, text encoder and VAE, or a separately documented compatible variant. Ordinary SDXL checkpoints are not substitutes in this graph.
- A writable output folder and an idea you have permission to use. No reference photograph, LoRA or custom node is required for this example.
If you have a basic laptop, the hosted option in Choose a route is an easier starting point. If your PC is ready for local AI, this workflow gives you direct access to the prompt, models, seed and saved files.
1. Put the three components in the right folders
Our exact files match the published Comfy-Org artifacts. The starter pack includes their SHA256 identifiers so you can distinguish the actual versions from files with similar names.
Use your installation’s model directory:
ComfyUI/
  models/
    diffusion_models/
      z_image_turbo_int8_convrot.safetensors
    text_encoders/
      qwen_3_4b_fp8_mixed.safetensors
    vae/
      ae.safetensors
The Comfy-Org model card lists these components and folders. It also provides BF16 and other quantised variants. This article’s settings and result use INT8 ConvRot plus the FP8 mixed encoder; do not silently change variants and expect the same pixels.
If the files are already installed, select them without downloading another copy. If you need them, use the publisher’s file listing, read the licence and check storage before downloading. After adding files, refresh the model choices or restart ComfyUI using your normal installation method. See why a model can be missing from the dropdown if it still does not appear.
2. Open the graph and check its connections
Download the starter pack below and open fox-workflow.json in ComfyUI. This is the visual editor graph. The separately supplied fox-workflow.api.json is an API prompt, not the same editor format.
The graph has ten core nodes. If you prefer to build it yourself, add and connect them in this order:
| Node | Setting or connection |
|---|---|
Load Diffusion Model (UNETLoader) |
z_image_turbo_int8_convrot.safetensors; weight dtype default. |
Load CLIP (CLIPLoader) |
qwen_3_4b_fp8_mixed.safetensors; type lumina2; device default. |
Load VAE (VAELoader) |
ae.safetensors. |
CLIP Text Encode (CLIPTextEncode) |
Connect CLIP from Load CLIP and paste the fox prompt. Its conditioning goes to KSampler’s positive input. |
Conditioning Zero Out (ConditioningZeroOut) |
Connect the same prompt conditioning; connect its output to KSampler’s negative input. |
Empty SD3 Latent Image (EmptySD3LatentImage) |
Width 1024, height 768, batch size 1; connect to KSampler’s latent image. |
Model Sampling Aura Flow (ModelSamplingAuraFlow) |
Connect the diffusion model; shift 3; connect its model output to KSampler. |
| KSampler | Use the settings in the next section. |
VAE Decode (VAEDecode) |
Connect KSampler’s samples and the loaded VAE. |
Save Image (SaveImage) |
Connect the decoded image; choose a recognisable filename prefix. |
This recipe uses zeroed negative conditioning and CFG 1. It does not use a second text box of negative instructions. Keep that arrangement while reproducing the example; SDXL prompt habits do not automatically carry over to every model.
3. Set the canvas, sampler and seed
Keep batch size at one for your first run, then enter these settings:
| Control | Our value |
|---|---|
| Canvas | 1024 × 768 pixels |
| Seed | 26101203 |
| Steps | 8 |
| CFG | 1 |
| Sampler | res_multistep |
| Scheduler | simple |
| Denoise | 1 |
| Sampling shift | 3 |
| Save Image prefix | HowDoesAIDoThat/20261012/new-subject-fox |
Set the seed’s control after generate to fixed if the visual editor exposes that control. Keep the exact model files and settings when comparing changes. A fixed seed helps organise an experiment, but does not guarantee identical results across software and hardware.
4. Write the scene and run it
Copy the prompt from Our fox illustration prompt below into CLIP Text Encode, then choose Run. Wait for the queue to complete and the Save Image result to appear.
Our prompt specifies five useful ingredients: the subject, a recognisable colour choice, its surroundings, the light and an illustration style. For a new idea, change those ingredients rather than piling on unrelated quality phrases.
For example, you could replace the fox and bicycle with a badger carrying a red umbrella, change the bakery to a greenhouse, and switch the rain to morning mist. That is a suggested variation, not an additional result we have generated.
Make one deliberate change per comparison. Changing the model, seed, sampler, size and prompt together makes it difficult to know which change helped.
5. Inspect the picture before using it
Open the original PNG at full size. Check the subject’s shape, clothing, paws, bicycle frame and wheels, reflections and any text-like marks. Look at the whole image as well as the crop you intend to use.
For our result, the fox, teal raincoat and yellow bicycle make a clear visual subject. The shop signs are the obvious correction point. “No lettering” in a prompt is a request, not an export guarantee. Crop unwanted signs, edit them out or replace them with lettering you create separately.
If the image is for a header, leave space for actual HTML text rather than asking the model to draw your headline. For a social post, add your title in an image editor and check it at the size people will see on their phones.
6. Save the result and the recipe
Save Image writes the original PNG into ComfyUI’s output directory, using your prefix and a numbered filename. Use the result’s download/save control, then reopen the saved file in an image viewer.
Keep these together:
- The original PNG.
- Your visual workflow JSON.
- The prompt, seed and settings.
- The model filenames and hashes.
- A note describing the changes you made and what needs correcting.
Export the workflow JSON from ComfyUI’s workflow save/export control as well as keeping the PNG. A screenshot or converted WebP may lose PNG metadata; the separate JSON is your portable recipe. No workflow download bundles the model weights.
For your website, make a smaller WebP copy for display while keeping the original PNG separately. Resize deliberately and check that the subject and any added lettering still read clearly. This site displays a preview and links the original result.
Prefer to create in your browser?
Higgsfield is a useful alternative when you want to create without installing models or upgrading your PC. The provider handles generation hardware, while you work through a browser with its image and video tools. Our Higgsfield guide shows an actual character image and a short animation, with the steps and exported results.
The local route is appealing when you want your own files, configurable graphs and no provider credit charge for each local generation. Higgsfield is appealing when easier setup and connected creative tools matter more. Check the current tool and generation quotation in your account before running it.
Explore Higgsfield in your browser →
This is an affiliate link. The fox was made locally, and the separate Higgsfield example uses a different subject; this is a choice of routes rather than a matched image-quality comparison.
Troubleshooting
The model is missing from a loader. Check the filename and its component folder. This graph loads a diffusion model, text encoder and VAE separately. Putting all three in checkpoints does not match these loader nodes.
A node or sampler is missing. Check your ComfyUI version and whether core nodes imported correctly at startup. Use the official Z-Image tutorial for the current supported setup; do not install random custom nodes merely because the graph cannot load.
The GPU runs out of memory. Stop other GPU-heavy work, keep batch size at one and reduce the canvas for a fresh test. A smaller image changes the recipe and result. The local hardware guide explains why weight sizes alone are not a complete memory estimate.
Details are wrong or unwanted text appears. Describe the most important subject and arrangement clearly. Inspect each output, then choose another seed or a separate targeted edit. Repeating an instruction does not make compliance certain.
The image saves, but the recipe is lost. Keep the original PNG and export the visual workflow separately. Re-encoded previews are display copies, not reliable workflow backups.
Testing and reuse
We generated and inspected this one 1024 × 768 fox illustration using the exact local components above. The recorded interval from submission to observed completion was 6.017 seconds, including queue and completion polling; it is not a GPU benchmark or a prediction for your PC. There was no hosted generation charge, and electricity was not measured.
The original prompt and reader workflow are provided with this guide. The Comfy-Org Z-Image repository declares Apache 2.0; component sources and identifiers are recorded in the provenance files. Model licences do not guarantee that every generated picture is suitable for a particular commercial use. Check your finished image, any references you supply and the intended use before publishing it.
Our fox illustration prompt
Original prompt used for the local fox result. Adapt the subject, setting and style to make a new scene.
An original editorial illustration of a small red fox wearing a teal raincoat, sitting beside an old yellow bicycle outside a quiet village bakery on a rainy autumn morning. Warm shop-window light reflected in cobblestones, painterly storybook texture, rich muted colours, confident composition. Full animal and bicycle visible. No human character, no words, no lettering, no watermark. Landscape illustration.Take the steps with you
Reader starter files
Executed local illustration starter: visual and API ComfyUI graphs, exact prompt, settings, component identifiers and original provenance. The original PNG is linked on the website; no model weights bundled. One fox generation was executed; other subject suggestions are untested.
Download the starter packSources and testing status
Primary references checked 2026-10-12. An original 1024 × 768 illustration generated locally with Z-Image Turbo on 12 October 2026. The original image, settings and workflow are available below.
- ComfyUI: Z-Image Turbo workflow and component folders
- Comfy-Org Z-Image Turbo: exact repackaged components and INT8 workflow
- Tongyi-MAI Z-Image Turbo: original model and declared Apache 2.0 licence
- ComfyUI installation requirements
- ComfyUI default keyboard shortcuts
- Higgsfield: choosing an image or video tool
- Higgsfield: how credits work